Configure the Google authentication provider
The first thing to do is to configure the OAuth2 Provider and obtain Client ID and Client Secret keys.
-
Obtain OAuth 2.0 credentials from the Google API Console.
Visit the Google API Console to obtain OAuth 2.0 credentials such as a client ID and client secret that are known to both Google and your application. The set of values varies based on what type of application you are building. For example, a JavaScript application does not require a secret, but a web server application does.
- Login with a valid Google Account

- Click on
APIs & Services

- Click on
Credentials

!!! note
The first time you land here, Google will ask to create at least one project 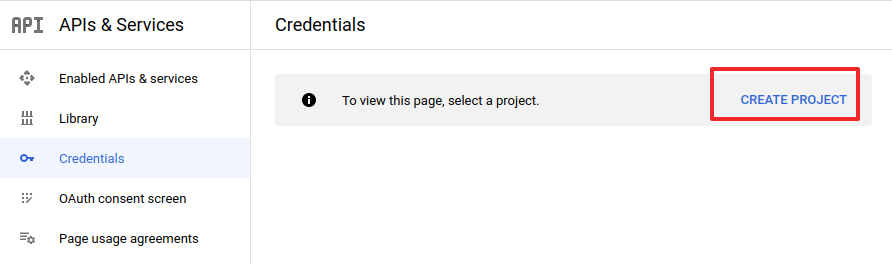 For the purpose of this tutorial we will create a sample project. You are free to create other projects or update existing ones through the [Google API Console](https://console.developers.google.com/) later. 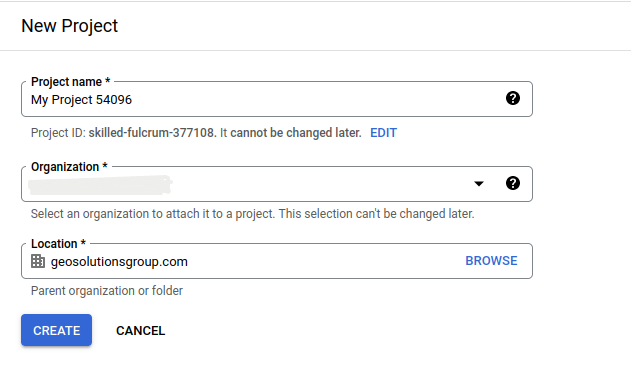 If no `Credentials` are present, you will be asked to create new one.  -
Select an existing (or create a new one)
OAuth Client ID
-
Configure a new
Web application- If it is the first time you create an
OAuth Client ID, you will be asked to create a newconsent screen

- Customize the
consent screen
!!! warning
This step is mandatory only if it's the first time you are defining a `Web application` on a new project. If you don't have an organization, you can only choose type External from the screen below.
- Fill the form below and click on
save and continueuntill all tabs are filled.

!!! note
It can be edited and updated also later (see last point of this section below)- From the credentials page, click on
CREATE CREDENTIALS>OAuth Client IDand selectApplication type->Web application
!!! warning
This step is mandatory only if it's the first time you are defining a `Web application` on a new project.
- Add a
Nameand theAuthorized redirect URIslike shown here below.
!!! note
  This sample creates a client working on the default local URL `http://localhost:8080/geoserver`. Of course this will work only on a local instance and can't be used for a production system.

  However it is possible to add as many `Authorized redirect URIs` you need to a new `Web application`.

  It is also possible to create many `Client credentials` with customised `consent screen` and `Web application`, depending on your specific needs. Every public GeoServer instance (or cluster of GeoServer belonging to a specific project) should have its own specific `Client credentials`.
!!! note
Always add two entries for each URI. One without the ending `/` and another one with it.
- If it is the first time you create an
-
Click on
Createand take note of theClient IDand theClient Secret.At the end of the procedure Google will show-up a small dialog box with the
Client IDand theClient Secret. That info can be always accessed and updated from the Google API Console
-
Optionally customize the
OAuth consent screen.At any time it is possible to update and customize the
OAuth consent screen. You can put here your logo, app name, ToS and so on.