invapi-dual-auth
Investec Programmable Banking tutorial - implementing dual authorisation on your credit cards
This is my submission for https://investec.gitbook.io/programmable-banking-community-wiki/get-building/build-events/open-q1-2024-bounty-challenge-or-the-tutorial-quest
Programmable Banking
From a developer’s perspective, Investec is way ahead of the other South African banks and offers multiple APIs to interact with your bank account, or the VISA credit cards associated with it. Check out their amazing offering and API documentation.
This tutorial is a mid-level guide to writing JavaScript code that resides “on” your credit card and executes each time the card is swiped, tapped or otherwise used. It demonstrates how an external API call can be made to determine whether to allow or deny the transaction. It can also easily be extended to log card transactions to your own cloud-based data store.
The dual authoriser business logic implemented is:
- Any card transaction over a pre-configured limit must be attempted twice.
- The first time the transaction will be denied.
- If a second, nearly identical transaction is made within a pre-configured time window, it will then be authorised.
- The card logic can be pre-configured to require the identical card OR a different card, depending on your requirements.
- The card namespace (or unique identifier) is used to isolate different profiles.
The tutorial can be completed within 20 minutes, and that includes signing up for a free Cloudflare account that provides a suitable online key-value pair database.
Content
- Opening the Programmable Banking IDE
- Card IDE basics
- Sign up for an online key-value pair database
- Store the configuration parameters in env.json
- Program the business logic in main.js
- Now what?
Opening the Programmable Banking IDE
:warning: Assumption: You have activated Programmable Banking for your account. If not, you can now enroll on Investec Online.
:warning: Assumption: You have read the Investec Card documentation
- Login to Investec Online and select Manage from the menu
- Select Investec Developer
- Scroll down to Programmable Card IDE and click Manage Code
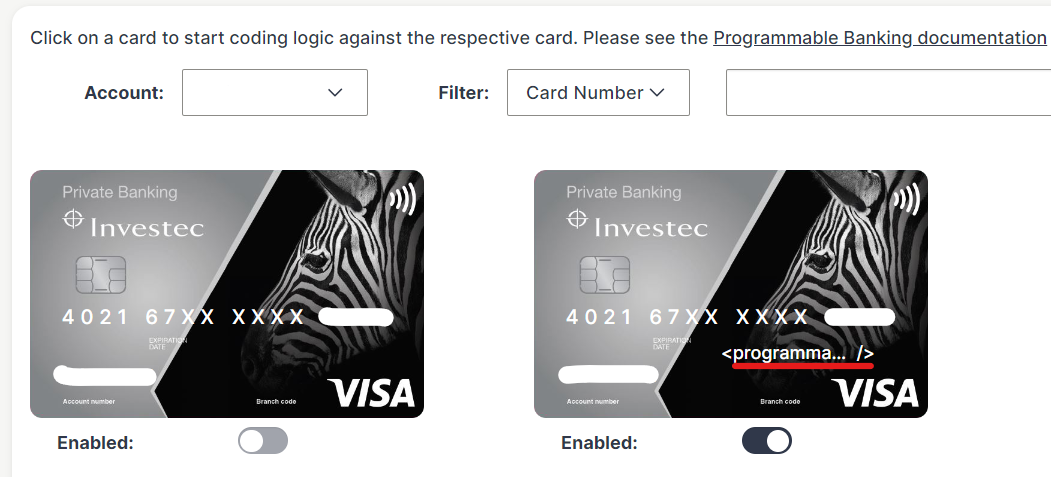
- Select your account, find the preferred card and toggle the Enabled button to On
- Hover over the card and click
to open the Card IDE
Card IDE basics
The left side of the IDE is a simple Monaco editor that can be used to edit the main.js and env.json files that we will use to store the code. Click on these file names to open them. You will notice that the template contains a beforeTransaction and an afterTransaction function. There are 3 other transaction triggers - refer to the JavaScript comments.

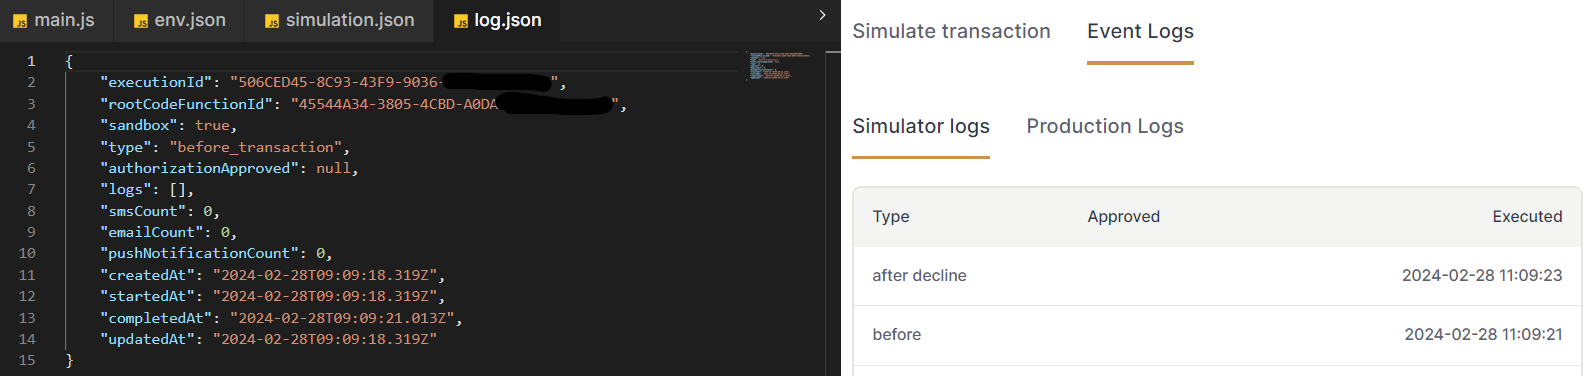
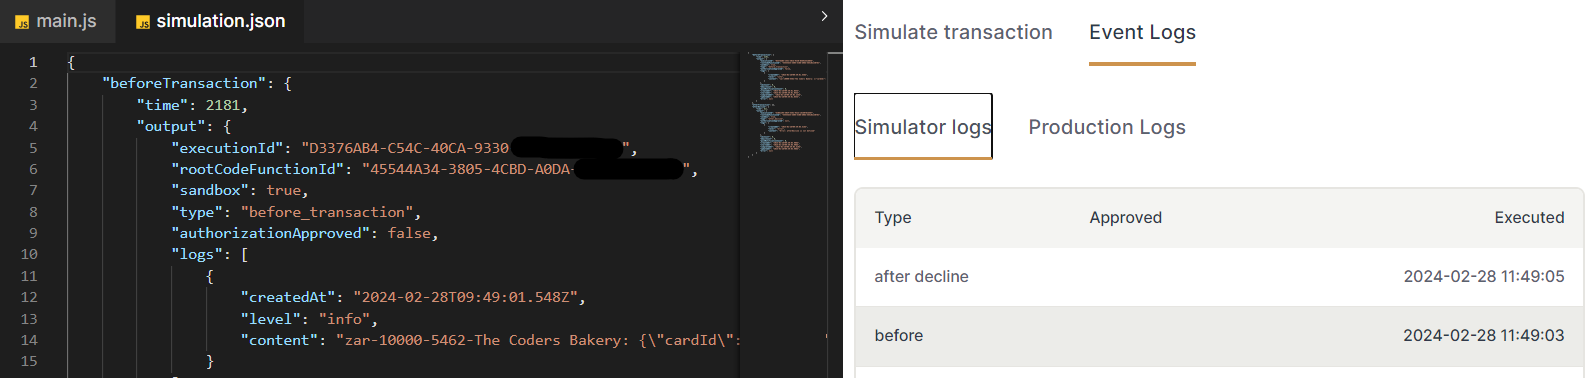
On the right, you will find a way to simulate a transaction and to view any event logs. Try it out now, by setting a transaction amount (in cents), the merchant code (e.g. 5462), merchant name (e.g. The Coders Bakery) and then click on Simulate card transaction. Switch to the Event Logs > Simulator logs and you will see a before and an after log entry, and the time that it was executed at. Click on before to load the record as simulation.json in the editor.
Sign up for an online key-value pair database
For this tutorial, we will make use of Cloudflare Workers KV that will allow us to write a temporary JSON object representing the transaction. It will be accessible via an API that allows 1000 write requests per day on the free plan. You can tweak the tutorial to make use of any other similar API.
PUT / GET
https://api.cloudflare.com/client/v4/accounts/{account_id}/storage/kv/namespaces/{namespace_id}/values/{key_name}
- Sign up at https://dash.cloudflare.com/signup
- Take note of your account_id in the URL: https://dash.cloudflare.com/da**********
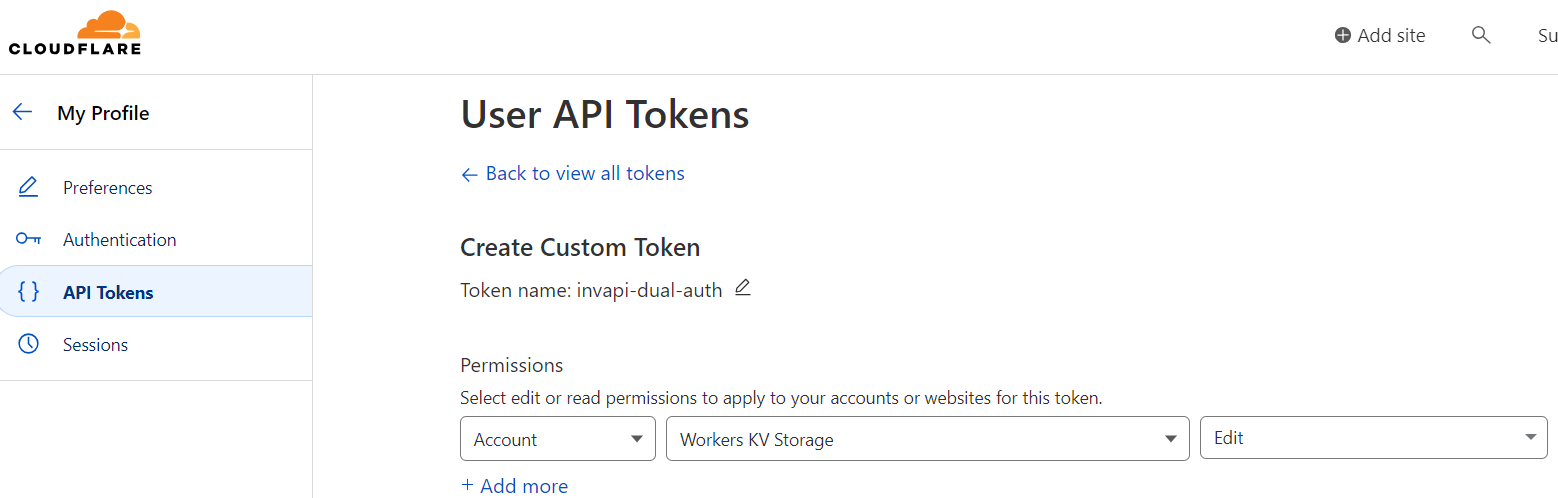
- First let’s create an API Token to use later: My Profile > API Tokens > Create Token > Create Custom Token > Get started
- Give it a suitable Name:
invapi-dual-auth - And allocate these Permissions: Account, Workers KV Storage, Edit
- You can leave the other settings at their defaults, or restrict the token usage further
- Copy the newly created API token: Eh***************
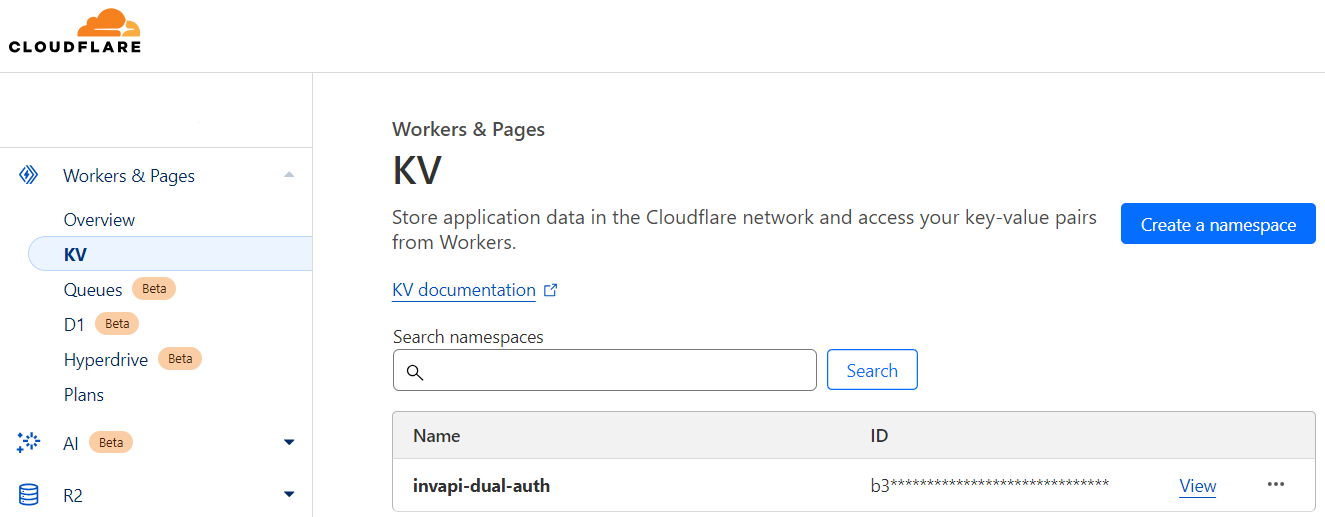
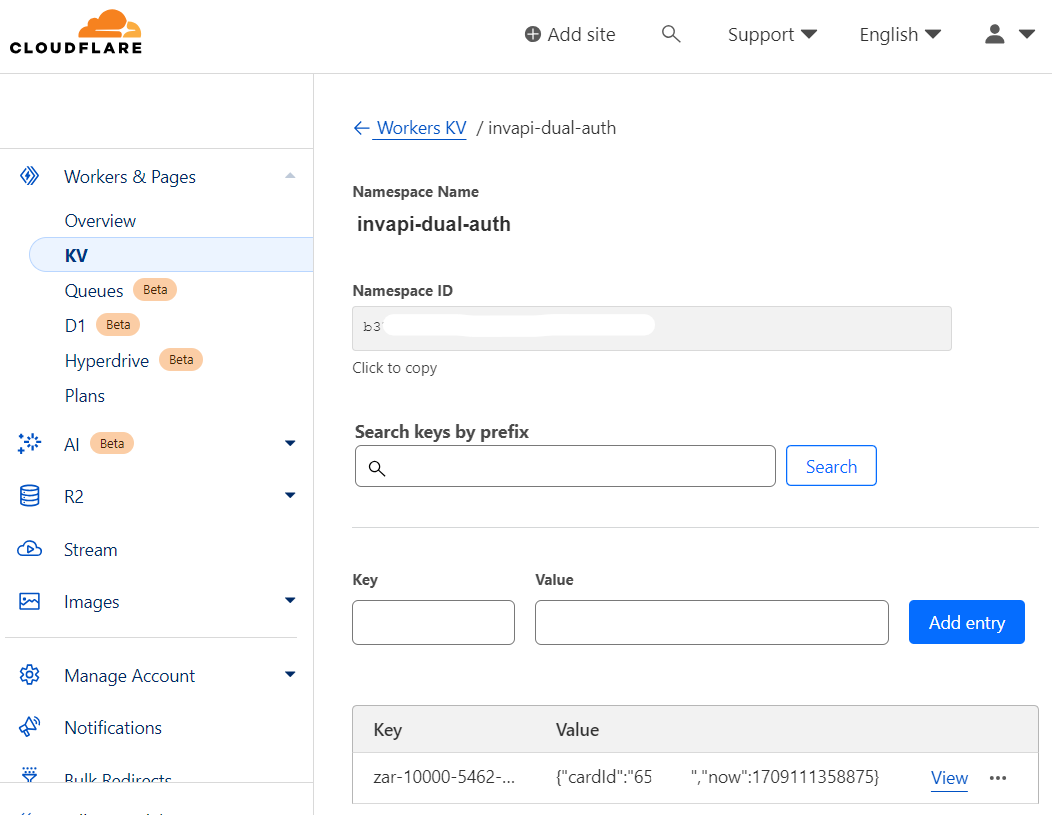
- Now let’s create a new KV namespace to store the data in. Select Menu > Workers & Pages > KV
- Create a namespace e.g.
invapi-dual-auth. Copy the random ID that is automatically generated. b3**********
:bulb: Tip: Keep the Cloudflare dashboard open for later testing.
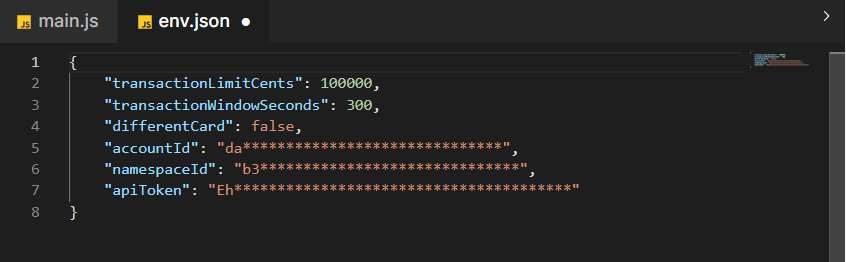
Store the configuration parameters in env.json
Back to Investec Online. We will now edit the env.json file in the IDE to store the business logic limits as well as the security tokens generated in the previous step.
Copy the JSON below and change it to suit your needs
{
    "transactionLimitCents": 100000,
    "transactionWindowSeconds": 300,
    "differentCard": false,
    "accountId": "da******************************",
    "namespaceId": "b3******************************",
    "apiToken": "Eh***************************************"
}
We will see later how to access these environment variables. (Hint: process.env.accountId)
Program the business logic in main.js
For the next 4 steps we will be editing the main.js file, to show you just how easy it is to use JavaScript to add custom functionality to your credit cards.
Key & value
We want to modify the beforeTransaction function to first build up a unique key for this transaction (and the following one) so that they can be paired together. While the transaction time will differ, the currencyCode, transaction amount, merchant category code and name will be constant and can be concatenated to form the unique key.
    const key = `${authorization.currencyCode}-${authorization.centsAmount}-${authorization.merchant.category.code}-${authorization.merchant.name}`
    const value = {'cardId': authorization.card.id, 'now': Date.now()};
    console.log(`${key}: ` + JSON.stringify(value));
For the value, we store the cardId (to check if the same or a different card is used for the second transaction) and the current timestamp, for later use.
Open main.js and insert this code at the start of the beforeTransaction function, Save and then simulate a transaction, as before.
The simulation.json file should open with an output that includes:
            "...",
            "sandbox": true,
            "type": "before_transaction",
            "authorizationApproved": true,
            "logs": [
                {
                    "createdAt": "2024-02-26T18:06:04.037Z",
                    "level": "info",
                    "content": "zar-10000-5462-The Coders Bakery: {'cardId':'65****', 'now':1708970764037}"
                }
            ],
            "..."
Storing key & value
Let’s write a storeKV function (at the top of main.js) to store this key and value in the data store:
async function storeKV(key, value) {
    const response = await fetch(
      `https://api.cloudflare.com/client/v4/accounts/${process.env.accountId}/storage/kv/namespaces/${process.env.namespaceId}/values/${key}`
  , {
      method: 'PUT',
      body: JSON.stringify(value),
      headers: { 'Authorization': `Bearer ${process.env.apiToken}`}});
  console.log(response);
};
and use it, in the beforeTransaction function, just after the code we added in the step above:
    console.log(`${key}: ` + JSON.stringify(value));
    await storeKV(key, value);
:bulb: Tip: Notice how we can access the environment variables using
process.env.accountIdetc. which helps to keep our code more secure.
Simulate again. It should have written a record to our online database. Let’s check.
Back in the Cloudflare dashboard (Menu > Workers & Pages > KV > View) in a URL similar to https://dash.cloudflare.com/da***********/workers/kv/namespaces/b3************
we can see the new record being stored:
| zar-10000-5462-The Coders Bakery | {“cardId”:”65**”,”now”:1708973567993} | | — | — |
Retrieving the value for a key
Now that we have got some data to use, let’s write a similar getKV function to retrieve it, based on the provided key. It might return 404 (Not Found) or an old (expired) value.
async function getKV(key) {
    const response = await fetch(
      `https://api.cloudflare.com/client/v4/accounts/${process.env.accountId}/storage/kv/namespaces/${process.env.namespaceId}/values/${key}`
  , {
      method: 'GET',
      headers: { 'Authorization': `Bearer ${process.env.apiToken}`}});
    return response;
};
and use it, replacing the call to storeKV (see the full main.js in the repository for guidance):
    console.log(`${key}: ` + JSON.stringify(value));
    // await storeKV(key, value);
    var prev_value = await getKV(key);
    const firstTrans = await prev_value.json();
    console.log(firstTrans);
Putting it all together
We now have all the pieces to combine all the business logic in the main.js file. Here’s the basic outline:
- create a key and value
- retrieve a previous value, if there is one
- if not, store the key & value and decline the first transaction
- check if the previous transaction was within the allowed time window
- if not, store the key & value and decline the transaction
- if a different/second card is required, check that they are different
- else check that the cards have the same ID
- approve the transaction if successful
- or store the key & value and decline this transaction
And, of course, there is no need to do these checks if the transaction is under the specified limit, just immediately approve.
Here are the code snippets:
    // Immediately authorise any purchases under the limit
    if (authorization.centsAmount <= process.env.transactionLimitCents) {
        return true;
    }
and
    const firstTrans = await prev_value.json();
    // console.log(firstTrans);
    if ((now - firstTrans.now)/1000 > process.env.transactionWindowSeconds) {
        // console.log('Too long ago: ' + (now - firstTrans.now)/1000);
        await storeKV(key, value);
        return false // Decline, and save as the first transaction
    }
and
    await storeKV(key, value); // Store as most recent, in case this transaction is now declined due to differentCard logic
    if (process.env.differentCard == "true"){   // Grrr, workaround env.json forcing everything to a string
        // console.log(cardId !== firstTrans.cardId)
        return (cardId !== firstTrans.cardId);
    } else {
        // console.log(cardId === firstTrans.cardId)
        return (cardId === firstTrans.cardId);
    }
If you need help, the full main.js can be found in the repository.
What are you waiting for? Try it out in the simulator!
Going live
Up to this point, we have only been simulating the transactions. The next step is to deploy this to one or more cards and to go shopping. You’ll just have to ask the teller to “please try the purchase again”.
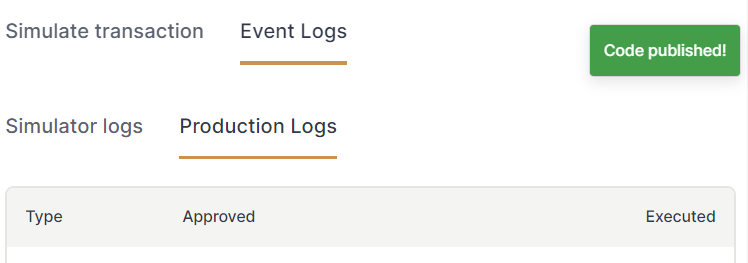
Click on Deploy code to card and check for the Code published! popup message.
Any logs will now appear under Event Logs > Production logs
Now what?
If you managed to test this out IRL, very well done to you!
How are you going to build on this? Perhaps you need the functionality where both husband and wife (or 2 business partners) need to swipe both their cards for any transactions over R10000, in which case set differentCard = true and deploy (using the same namespace) to each partner’s card.
What about the first (declined) transaction pushing an authorisation request to an approver, who responds with a yes or no, which the second transaction can then reference?
Let your imagination run wild!
:bulb: Tip: Join the Programmable Banking Community for more inspiration.